1. What is Entity Framework Code First with Existing Database?
2. Entity Framework Code First (Existing Database) Programming Example
Entity Framework Code First with Existing Database approach enables you to use your old database in new MVC5 application. It is much helpful when you are upgrading your project into New MVC architecture with ASP.NET. Here is step by step guide to use existing database with Entity Framework 6.
Step 1. Create New Project
EF_ExistingDb in Visual Studio. If you don’t know how to create new Project in Visual Studio then go to the following step by step guide.Start A New ASP.NET Web Application (.NET Framework) Project
Step 2. Install Entity Framework
INSTALL ENTITY FRAMEWORK INTO YOUR PROJECT
Step 3. Create Context class from Existing Database
1. Right Click on your Project Name in Solution Explorer > Add > New Item.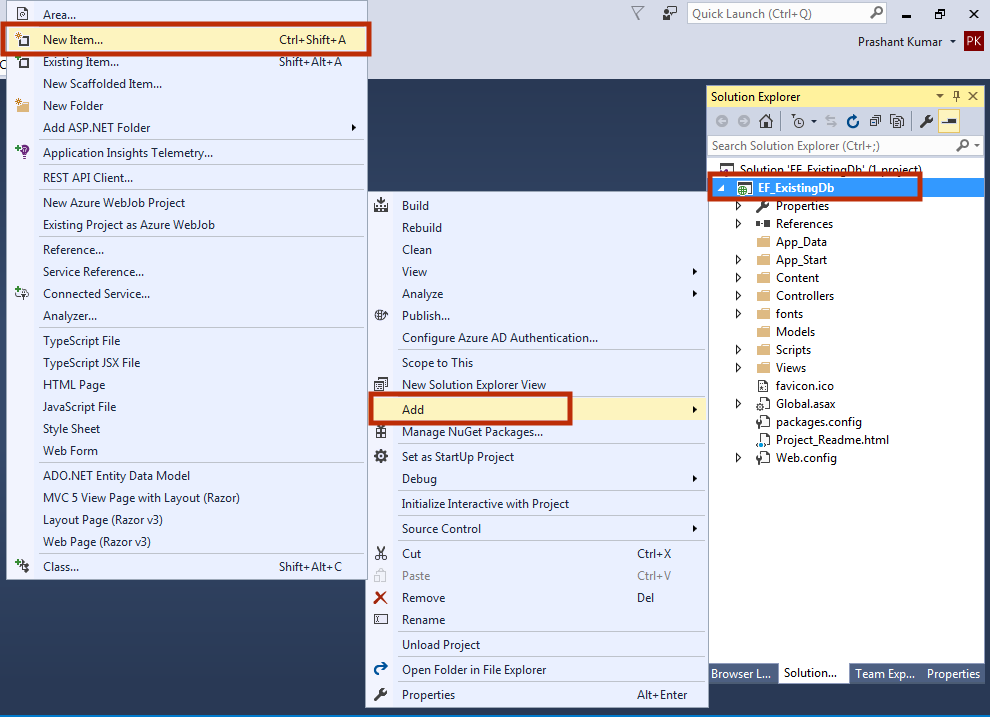
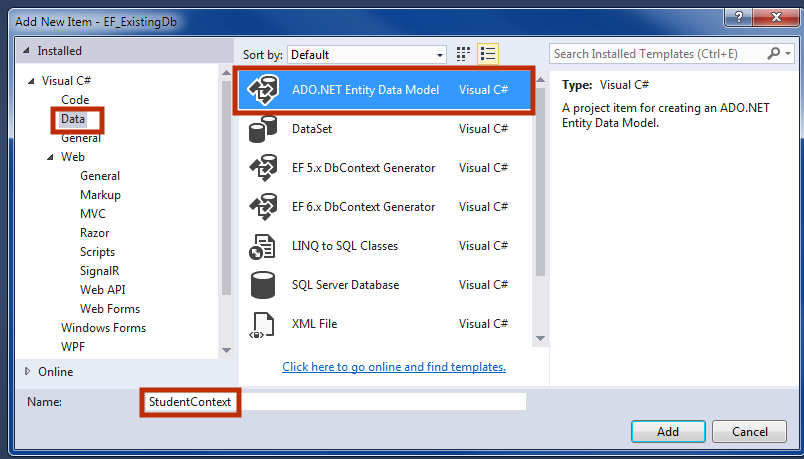
2. Select Data in left pane and then select ADO.NET Entity Data Model in middle pane. Give Model name as StudentContext and click on Add button.
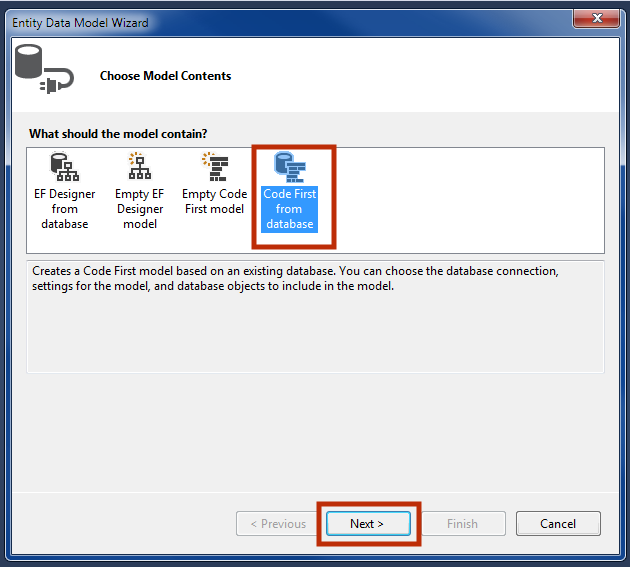
3. Now, select Code First from database and click Next.
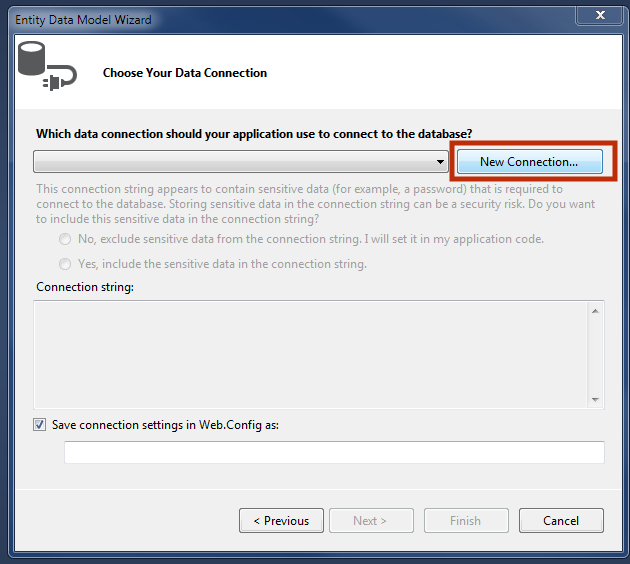
4. Here, choose your connection for your database. If there is no connection then create a New Connection
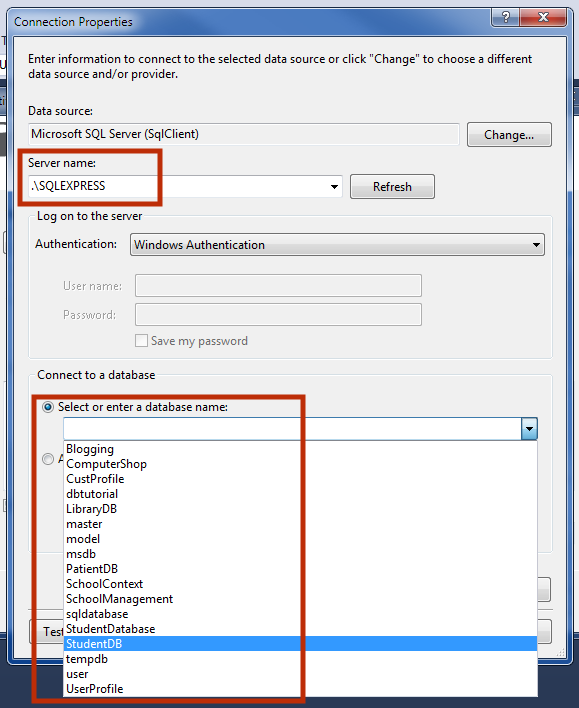
5. Select Server Name. If you are using SQLEXPRESS then write .\SQLEXPRESS as a server name. After giving Server name you will notice that all the database related to that server is available. Choose your existing database that you want to use.
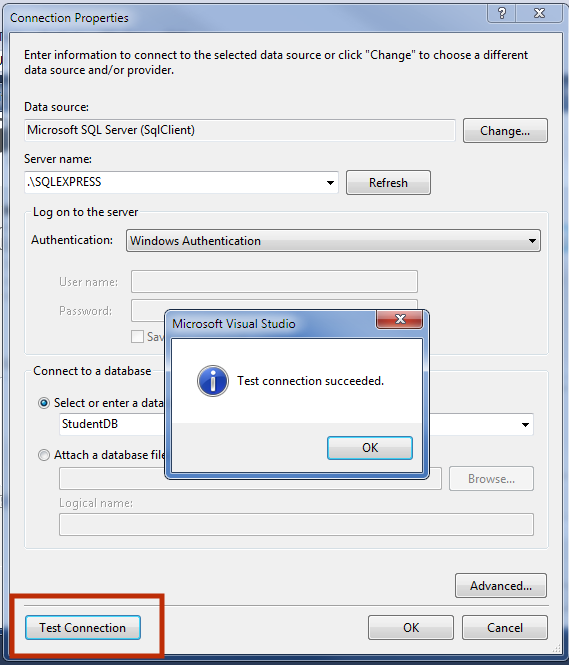
6. Click on Test Connection button to check connection status. If Connection is successful then click OK button.
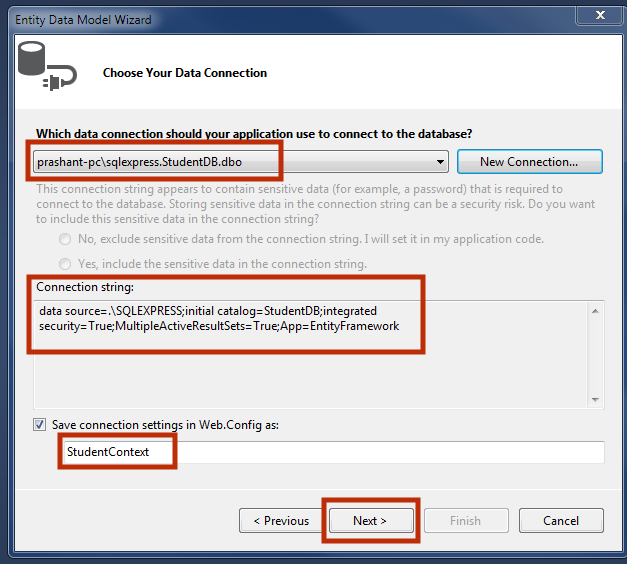
7. You will get back in previous wizard. Here, you will notice that a connection string is generated for your new database. Click on Next button.
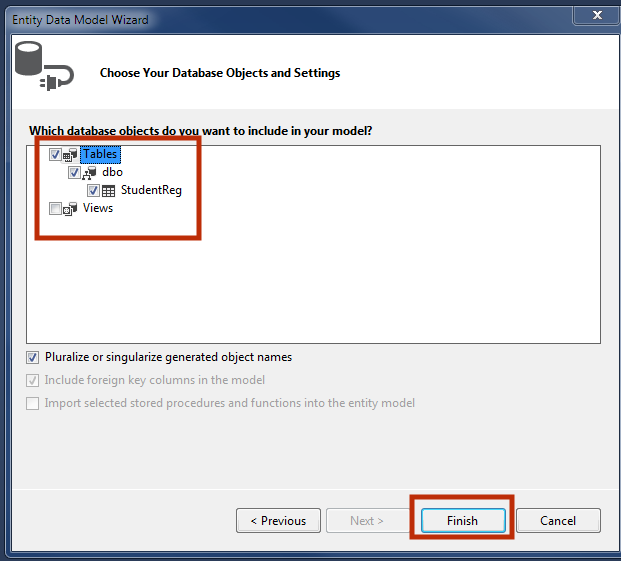
8. Select all the Table and Views. Here, I have only one table. Click on Finish button.
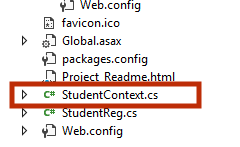
9. Now, you can see that StudentContext.cs class is created.
namespace EF_ExistingDb
{
    using System;
    using System.Data.Entity;
    using System.ComponentModel.DataAnnotations.Schema;
    using System.Linq;

    public partial class StudentContext : DbContext
    {
        public StudentContext()
            : base("name=StudentContext")
        {
        }

        public virtual DbSet<StudentReg> StudentRegs { get; set; }

        protected override void OnModelCreating(DbModelBuilder modelBuilder)
        {
        }
    }
}
10.Build the project by pressing Ctrl + Shift + B. It is necessary otherwise you will get error message when adding scaffolded item in controller.
Step 4: Add Scaffolded Item
1. Add Scaffolded Item to test this database. Right click on controller folder > Add > New Scaffolded Item.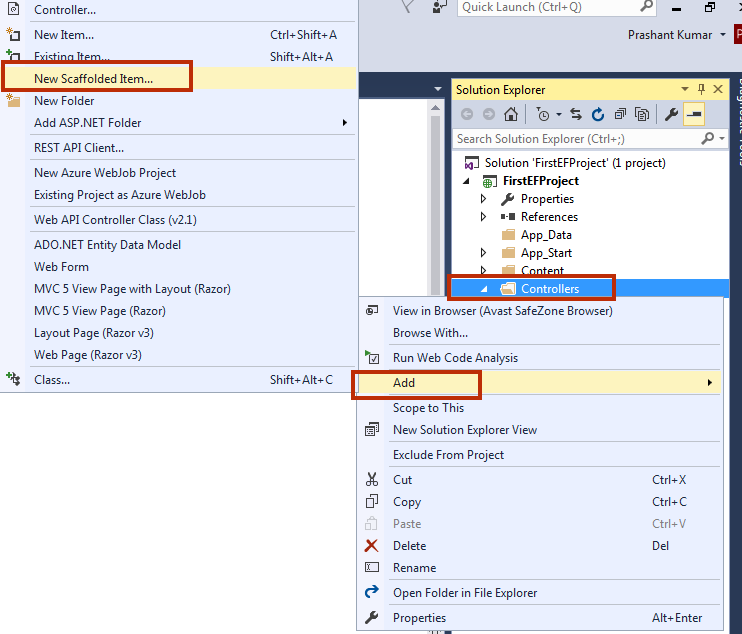
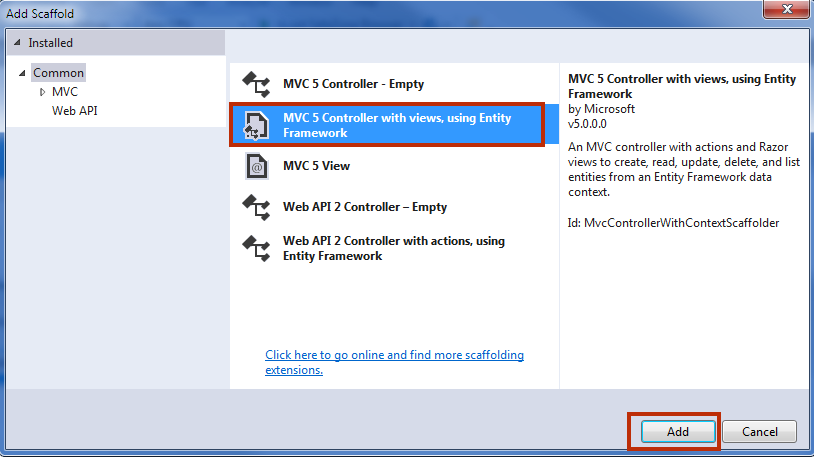
2. Select MVC 5 Controller with views, using Entity Framework and click Add button.
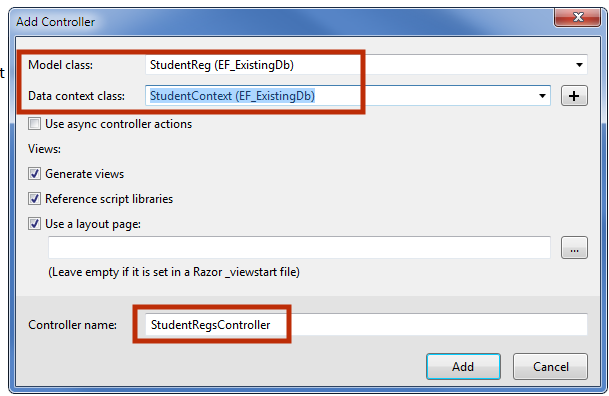
3. Select StudentReg (EF_ExistingDb) in Model class and StudentContext (EF_ExistingDb) in Data Context class and click on Add button.
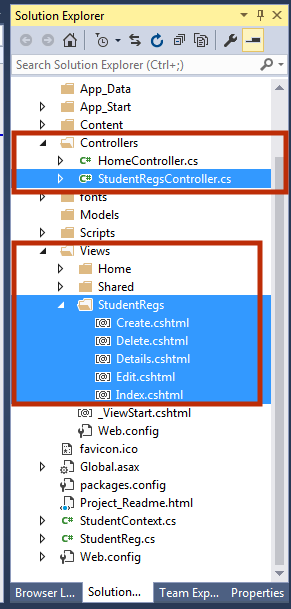
4. You will notice that StudentRegsController is added in controller folder as well as StudentRegs folder is added in View Folder.
Step 5: Add Navigation Menu and Run your Project
1. Place a link on Navigation Menu for Student Registration. Open Shared > _Layout.cshtml and add a link.
<div class="navbar-collapse collapse">
                <ul class="nav navbar-nav">
                    <li>@Html.ActionLink("Home", "Index", "Home")</li>
                    <li>@Html.ActionLink("About", "About", "Home")</li>
                    <li>@Html.ActionLink("Contact", "Contact", "Home")</li>
                    <li>@Html.ActionLink("Student Registration", "Index", "StudentRegs")</li>
                </ul>
            </div>
2. Run your project by pressing F5 button.
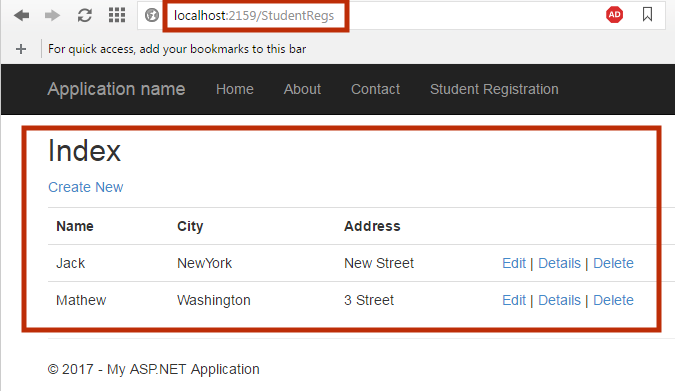
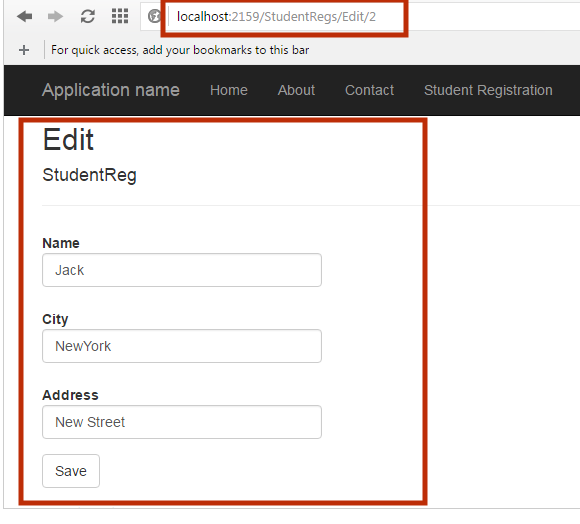
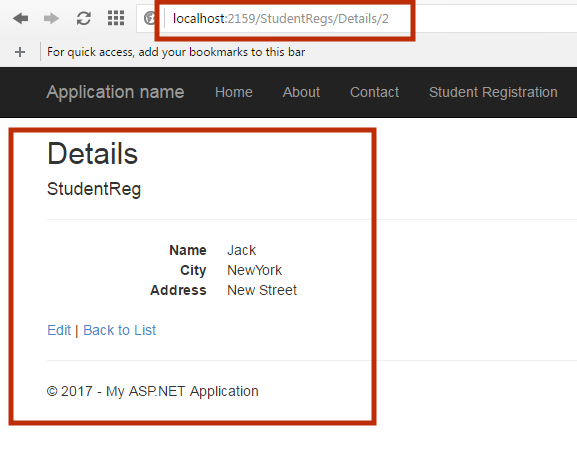
Output
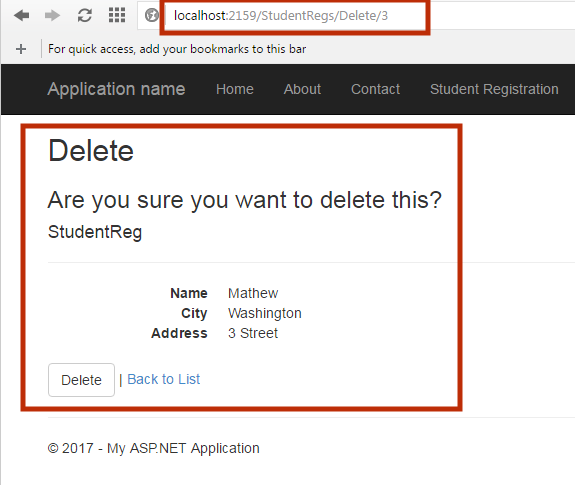
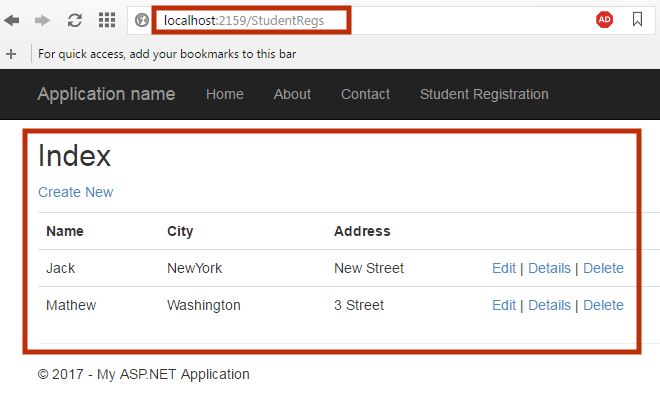
Summary
In this tutorial, you learned how to use Entity Framework to manage Old or Existing database. We tried to provide you complete step by step guide so you can easily learn Entity Framework. In the next chapter, you will learn Entity Framework with Model First architecture.