1. What is RenderBody, RenderPage, and RenderSection in MVC 5?
2. How to use
@RenderBody?3. How to use
@RenderSection?4. How to use
@RenderPage?5. What are
Styles.Render and Scripts.Render and How to use it?While creating Master Page Layout in ASP.NET MVC 5, you may encounter with @RenderBody, @RenderPage, and @RenderSection. In this tutorial, you will learn all about these with complete programming example.
@RenderBody
@RenderBody is used for injecting content from child page into the master page design. If there is no named section in child page, the content will get displayed in RenderBody section.
Example://Layout Page
<div class="content">
            @RenderBody()
</div>
//Child Page
@{
    ViewBag.Title = "DarkLayoutPage";
    Layout = "~/Views/Shared/_MyLayout.cshtml";
}


<h2>DarkLayoutPage</h2>
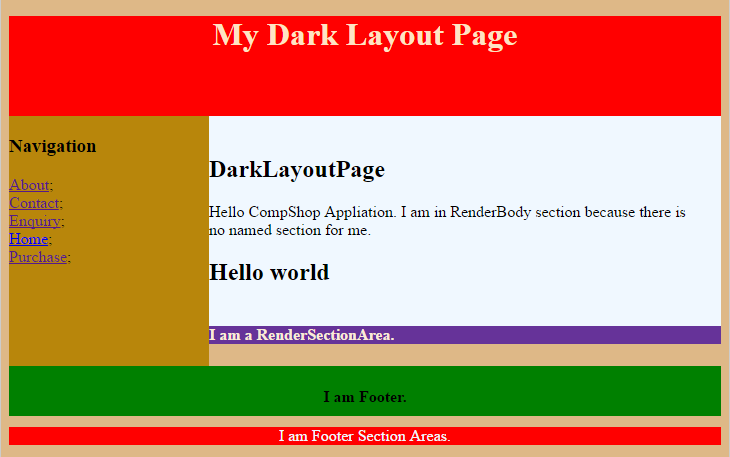
Hello CompShop Appliation. I am in RenderBody section because there is no named section for me.
Output

@RenderSection
@RenderSection is used for injecting content in the defined section. It allows you to specify a region in Layout.
Two steps are there to define @RenderSection in ASP.NET MVC.
A. Specify a@RenderSection Area in Layout Page.
<div style="background-color:rebeccapurple; color:antiquewhite; font-weight:bold">
        @RenderSection("Note",false)
    </div>
    <!-- End of Content Body -->

    <!-- Footer -->
    <footer>
        <h4>I am Footer.</h4>
        <div style="background-color:red; color:aliceblue">@RenderSection("Footer", false)</div>
    </footer>
B. Use this specified section to inject content from child page.
@{
    ViewBag.Title = "DarkLayoutPage";
    Layout = "~/Views/Shared/_DarkLayout.cshtml";
}

<h2>DarkLayoutPage</h2>

Hello CompShop Application. I am in RenderBody section because there is no named section for me.

@section Note
{
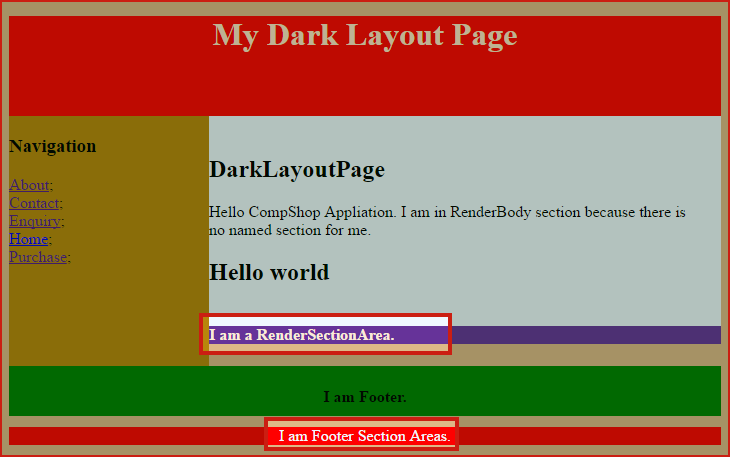
    I am a RenderSectionArea.
}

@section Footer
{
    I am Footer Section Areas.
}
<h2>Hello world</h2>
@section Footer before @section Note and the output would be same. You have noticed that I have used false parameter when created a section on the layout page.
@RenderSection("Footer", false)
false parameter denotes that Footer section is optional and It is your choice whether to use it or not. If you use true parameter then it is compulsory to use this section in child page otherwise you will get following error.
Output:

@RenderPage
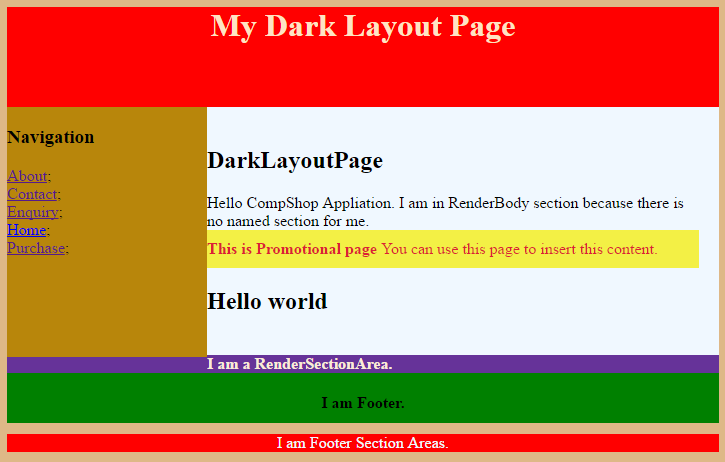
@RenderPage is used to call one page inside another page. For example, you have promotional texts and photos, and you want to use it all on your page but the condition is that promotions have to change frequently.
You just create a page containing promotional texts and photos and use this page wherever you want to insert. When the web page will get rendered in the browser, it will render all the content of that page. When you want to change promotional texts just change it in one place and it would reflect all the pages.
Example:1. Go to View Shared folder and create
_StaticPromotionalPage.2. Add following code into this page.
<div style="padding:10px; background-color:#f3f045; color:#dc1f36; position:inherit">
    <strong>This is Promotional page</strong>
    You can use this page to insert this content.
</div>
3. Now, open Home DarkLayoutPage.cshtml and insert _StaticPromotionalPage like this.
@RenderPage("~/Views/Shared/_StaticPromotionalPage.cshtml")
Output:

COMPLETE CODE
<!DOCTYPE html>

<html>
<head>
    <meta name="viewport" content="width=device-width" />
    <title>@ViewBag.Title</title>
</head>
<body style="background-color:burlywood">

    <!-- Header -->
    <header>
        <h1 style="text-align:center; color:bisque">My Dark Layout Page</h1>
    </header>
    <!-- End of Header -->

    <!-- Left Sidebar -->
    <nav>
        <h3>Navigation</h3>
        @Html.ActionLink("About","About");<br />
        @Html.ActionLink("Contact", "Contact");<br />
        @Html.ActionLink("Enquiry", "Enquiry");<br />
        @Html.ActionLink("Home", "Home");<br />
        @Html.ActionLink("Purchase", "Purchase");<br />
    </nav>
    <!-- End of Left Sidebar -->

    <!-- Content Body -->
    <div class="content">
            @RenderBody()
    </div>

    <div style="background-color:rebeccapurple; color:antiquewhite; font-weight:bold">
        @RenderSection("Note",false)
    </div>
    <!-- End of Content Body -->

    <!-- Footer -->
    <footer>
        <h4>I am Footer.</h4>
        <div style="background-color:red; color:aliceblue">@RenderSection("Footer", false)</div>
    </footer>

    <!-- Style -->
    <style>
        header {
            height: 100px;
            width: 100%;
            background-color: red;
        }

        nav {
            float: left;
            width: 200px;
            height: 250px;
            background-color: darkgoldenrod;
        }

        .content {
            background-color: aliceblue;
            padding: 20px;
        }

        footer {
            background-color: green;
            width: 100%;
            height: 50px;
            float: right;
            text-align: center;
        }
    </style>
</body>
</html>
@{
    ViewBag.Title = "DarkLayoutPage";
    Layout = "~/Views/Shared/_DarkLayout.cshtml";
}


<h2>DarkLayoutPage</h2>

Hello CompShop Application. I am in RenderBody section because there is no named section for me.

@RenderPage("~/Views/Shared/_StaticPromotionalPage.cshtml")


@section Note
{
    I am a RenderSectionArea.
}

@section Footer
{
    I am Footer Section Areas.
}


<h2>Hello world</h2>
using System.Web.Mvc;

namespace CompShop.Controllers
{
    public class HomeController : Controller
    {
        public ActionResult Index()
        {
            return View();
        }

        public ActionResult About()
        {
            ViewBag.Message = "Your application description page.";
            return View();
        }

        public ActionResult Contact()
        {
            ViewBag.Message = "Your contact page.";
            return View();
        }

        public ActionResult Enquiry()
        {
            return View();
        }

        public ActionResult Purchase()
        {
            return View();
        }
        public ActionResult DarkLayoutPage()
        {
            return View();
        }
    }
}
_StaticPromotionalPage.csthml<div style="padding:10px; background-color:#f3f045; color:#dc1f36; position:inherit">
<strong>This is Promotional page</strong>
You can use this page to insert this content.
</div>
Output:
Summary:
In this chapter, you learned @RenderBody, @RenderSection, and @RengerPage in details with complete programming example. In the next chapter, you will learn about Partial View Pages in ASP.NET MVC5.